
________________________________________
Draws an arc

Right-click commands
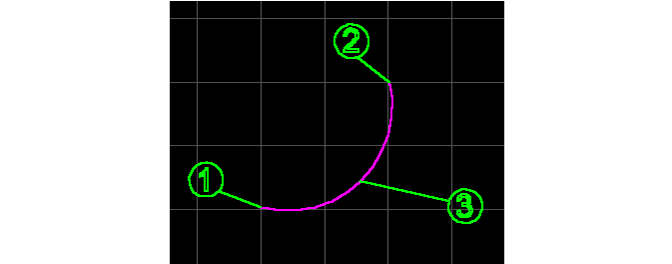
The Three Point Arc is similar to Three Point Circle, except that instead of two arcs (to form a complete circle), only one arc is drawn.
Note that the three points for the arc can be specified in any order. This is useful for smoothing entities on complex shapes (such as the dragon in the Samples folder). Click on two endpoints, then move the mouse between, and "bend" the arc into place.
You cannot make an arc greater than 180 degrees (a semicircle). When the third point is pulled to spots that will create an arc of more than 180 degrees, LAYOUT chooses the "other" piece of the complete circle and uses it as the arc.
Draw an arc by specifying three points:
- One end of the arc
- The other end of the arc
- The third point that lies on the arc
Essentially, you "anchor" each end of the arc, and then choose a third point to uniquely identify the arc. (These three points can be specified in any order.)

Specify three points to draw an arc

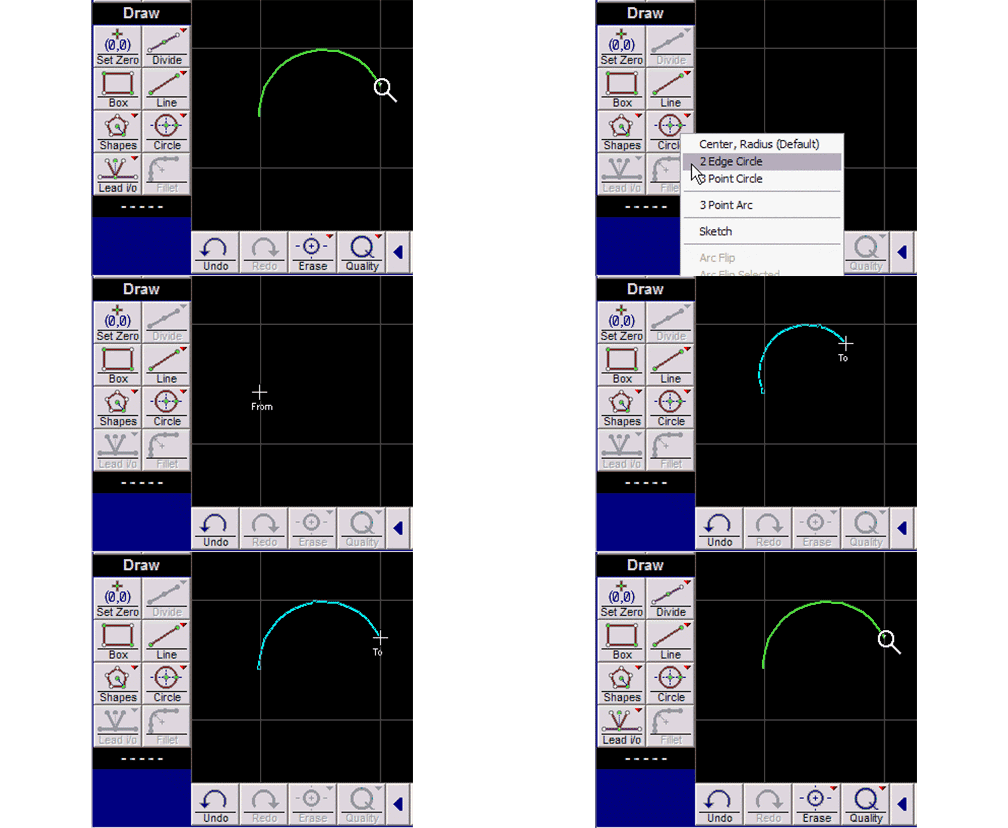
1) Right-click on the Circle button and select "3 Point Arc." (You can also press A to start the Arc command.)
The toolbar appears. Use these tools to specify where one end of the arc will be.
After the first point is specified, a light blue line will follow the cursor as it's moved around.
You can also click the left mouse button anywhere on the drawing to specify the first point.
Press at any time to cancel drawing the arc.

Use the Snaps toolbar to specify the location of one end of the arcs
2) Specify the location of the second point using the toolbar.
After the second point is specified, a light blue arc will follow the cursor as it's moved around. Depending on the location of the cursor, the arc may "snap" to the opposite side.
You can also click the left mouse button to specify the second point.
3) Specify the location of the third (and final) point using the toolbar.
You can also click the left mouse button to specify the third point.
4) The arc is drawn.