
________________________________________
XData is "eXtra Data" that can be assigned on a per-entry basis to any entity in a drawing or tool path.
- Specify delays and pause points
- Specify an entity to run at a particular absolute speed, percent of separation speed, or other speed
- Specify that the next entities should be interpreted as rotary motion, so that one can cut a pattern on the surface of a tube
- Command the rotary axis to move by a specific angle, or to a specific angle
- Specify the nozzle to move to a specific tilt angle with various different ways to specify the angle.
- Add a comment to an entity, such as a note to the operator to display on the screen.
- Create tilt via vectors for easier post processor writing.
- ...and more

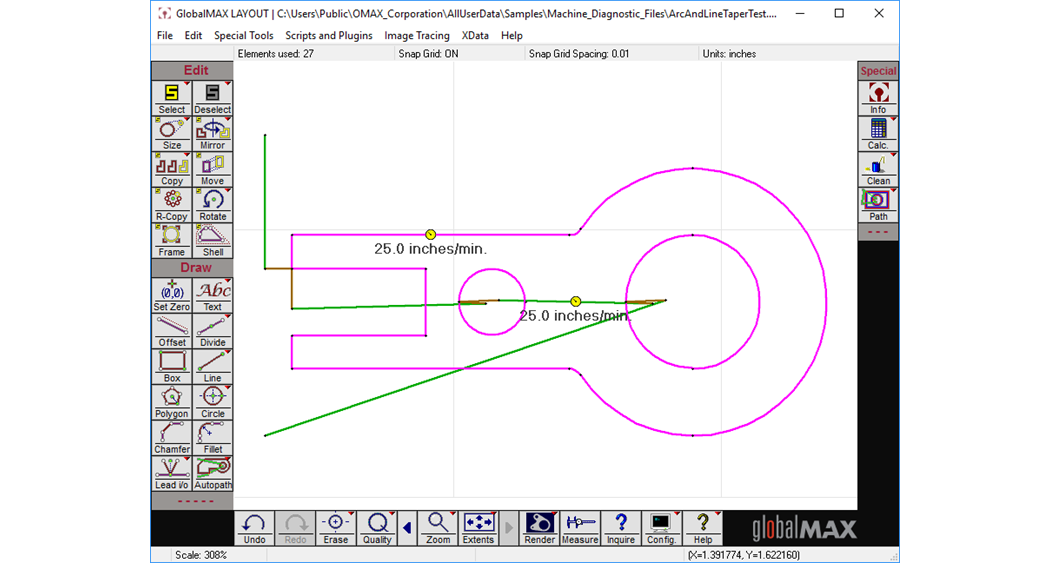
Examples of line entities with XData attributes assigned.
The easiest way to add XData to a path is to use the "XData" commands from the pull-down menu at the top of the screen in LAYOUT :

From there, one can specify XData to be assigned to entities, or choose how XData is displayed on the screen. XData can also be saved in parametric shapes, assigned via the 3D Path Editor Utility, generated from within Scripts, or hand coded into OMX files.
XData items are typically executed at the start of the entity the XData is assigned to. Please note that because the path direction is undefined in LAYOUT, the XData is displayed in the middle of the entity, even though once the path is defined it typically executes at the entity start.
Warning to Novice Users:
XData is an advanced feature with a lot of power and flexibility. As such, it can get the novice user into trouble. Although not all XData items are difficult to use, it is recommended that one become proficient with traditional tool paths that do not use XData prior to jumping into XData programming. Alternatively, the novice may wish to stick with the simpler XData types such as "Pause" and "Comment". In addition, some XData items may override or modify standard behaviors and as such should be used with additional caution, previewing, dry running, etc.
XData is displayed in some (but not all) dialogs in LAYOUT, MAKE, and the 3D Path Editor that show CAD or tool path data. To enable, disable, or configure how XData is displayed, look for the "XData / Redraw Style" menu at the top of the screen.
Use the "^" key to quickly toggle the XData redraw style for most OMAX Software displays that show XData – even some displays that don't have menu items for changing the XData display style.
Each XData item has a corresponding icon that can be displayed. The colors of the icons have meaning as such:
- Yellow = "This is an override / we are overriding something"
- Green = "Start / we are starting something"
- Red = "Stop / we are stopping something previously started"
- Blue = "Commanded motion / we are commanding an axis to do a simple move."
- Other Colors = "Misc"
- The automatic pathing "AutoPath" tools in LAYOUT may not preserve all XData items, and may modify their location or remove them when new leads or traverses are generated. It is generally recommended to avoid assigning XData prior to autopathing, and a suggested best practice is to avoid using AutoPath when working with XData.
- When interfacing with other CAD systems, XData will typically be stripped out of any DXF file when imported into that other CAD system.
- XData can be complex and represents tremendous possibilities and flexibility. The flip side of this is that it can also get the novice programmer into trouble. There is not as much "hand holding" as for other OMAX features, and error messages can be harder to diagnose. Use XData with care, taking the time to understand things thoroughly for the best experience.
- Use the Preview functions in MAKE to double check paths thoroughly prior to pressing "begin". The "Tilt Preview" function is especially useful when working with tilting.
- Not all XData items can be rotated. If you rotate an XData item in LAYOUT, the angles specified for that XData item may not rotate along with the path, unless the XData is one that specifies rotation as relative to the path itself. Be cautious when rotating, and note that commands in MAKE and other places may simply disallow rotations.
- Not all available XData commands are exposed through the user interface in LAYOUT . Some commands are considered Advanced, and the "Show Advanced XData Items" check box must be selected for them to appear in the XData Editor, Choose Command drop-down menu. Some XData commands are intended to be used at the OMX file level only. For example, when making post processors to output to the OMAX from 3rd party software. Refer to the commands identified as "[Hidden]" in XData Command Reference.
- In the XData Editor form, if one moves the mouse over the icon for the XData, additional information will be displayed as a hint.
- You cannot assign more than one XData item on a given entity, but you can divide an entity into pieces and assign unique XData to each piece.
- In most cases, XData items "execute" or otherwise take effect at the very start of the entity.
- OMAX is looking for feedback and requests for future XData items. Please email requests and feedback to softwareengineering@omax.com